
Content
- Build a climbing aid for Clematis yourself - that's how an obelisk succeeds
- material list
- Construction manual for the climbing aid
- Beautiful clematis for a rank obelisk
- Tips & Tricks
Build a climbing aid for Clematis yourself - that's how an obelisk succeeds
If the clematis climbs up an obelisk, this trellis aid creates a picturesque appearance. With a little manual skill, you can easily build the wooden structure yourself. The following instructions explain step-by-step how to succeed.
material list
From the following material you construct a Rank Obelisk, which can be used both in the bed and in the tub.
In addition, you will need: 4 tent pegs, wooden dowels, nails, chipboard screws and waterproof wood glue. The top of the Rank Obelisk is 1 wooden ball with a diameter of 80 mm.
Construction manual for the climbing aid
Cut the timbers to the specified dimensions and then smooth the saw edges. Ideally, drill the mounting holes before mounting the trims on the corner posts. In this way, the wood can not splinter. Follow these steps:
In the next step, you can paint the climbing aid for the clematis with weatherproof color, ideally matched to the selected flower color of the clematis. Finally, screw the tent pegs firmly so that they give stability to the trellis and thus also the clematis in the bed or bucket.
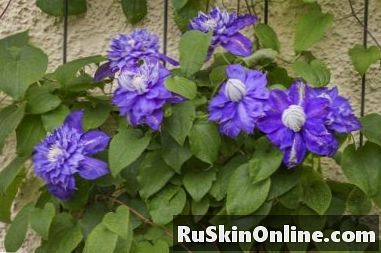
Beautiful clematis for a rank obelisk
It is the magnificent flowering hybrids that are excellent for cultivation on a rank obelisk. The following varieties thrive to 180 centimeters high, so they climb the top of the self-built trellis over time.
Each clematis takes 1 to 2 years to develop its full beauty from the 3rd year. During this time she conquers with her strong petioles the trellises of the self-made obelisk.
Tips & Tricks
Build several obelisks as a climbing aid for the clematis and place them in large containers next to each other. In this way, you create an enchanting privacy for the balcony, the terrace or the seat in the garden.