
Content
- Create a new flowerbed - step by step
- planting plan
- Preparation of the bed
- soil improvement
- Mark planting areas and plant perennials
- Plant perennials
- Tips
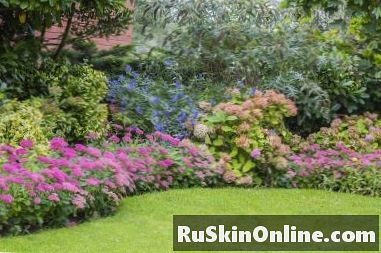
In order for a flowerbed to look permanently beautiful, a little planning is needed
Create a new flowerbed - step by step
A flowerbed brings color and variety into the garden, the flowering shrubs and shrubs conjure the gardener a smile on his face and serve - if pase nectar plants were selected - many insects as a source of food. The creation of such a Staudenbeetes is not complicated, but only requires some planning.
planting plan
The first step is to create a planting plan that determines the location, shape and size of the flower bed and the planting location. When planning, you should either choose a theme (such as a specific color or a limited flowering period) or put together a colorful mixed perennial border that combines plants of different growth forms and sizes, flower colors and flowering times. In larger beds, other groups of plants, such as onion flowers, shrubs or ornamental grasses, are added.
Preparation of the bed
The perfect time to plant the flowerbed is early fall, when the ground is still warm from the sun and the first frosty nights are still a few weeks away. Thoroughly dug up the planting area, remove weeds, roots and stones, mince the crumb and then rake the bed well.
soil improvement
If necessary, a soil improvement is necessary, in which you improve loamy soils with plenty of sand and compost and sandy with topsoil and compost. Especially compost in combination with horn shavings is a valuable remedy and at the same time it serves the shrubs and other plants for nutrient supply.
Mark planting areas and plant perennials
Now mark the intended planting places, which can happen with sand. You do not need to remove it later, just dig it in during the planting. If you are satisfied with the overall picture, now lay out the potted perennials. Then the planting plan can still be corrected if necessary, but you must always keep in mind the following changes: The perennials will grow and some will be very large - the large, now so small-looking plants are always in the background of the bed, the smaller ones move forward.
Plant perennials
Now dig the planting holes, which should be about twice as large as the root ball of the plant. Do not plant the shrubs deeper than they used to be in the pot, press them firmly and pour them vigorously. You can then cover the flowerbed with bark mulch and, if present, foliage. This not only keeps the moisture in the soil and serves as a natural fertilizer, but also protects the plants from the coming winter cold. If necessary, later covering with twigs - preferably spruce or fir twigs - makes sense as winter protection.
Tips
If you choose perennial, perhaps even long-lived species, you do not need to recreate the flowerbed every year.