
Content
- Lay garden plates correctly
- Tile coverings always need a slope
- Create a suitable substructure for garden plates
- Laying concrete slabs - That's how it works
- Grouting concrete slabs
- Laying natural stone slabs - you should pay particular attention to this
- Tips
When laying garden boards precision is required
Lay garden plates correctly
Laying concrete or natural stone slabs in the garden is not an easy task and, above all, heavyweight. If concrete slabs can be inserted quite easily, the laying of natural stone slabs is a lot more demanding. Not only that, the material is often much more expensive, also the editing and the professional juxtaposition require a certain degree of sensitivity and knowledge of materials.
Tile coverings always need a slope
Tile coverings always require a slope, so that excess surface water can run off. Laying on sand and grit with permeable joints, two percent of slopes are sufficient, but sealed surfaces require a gradient of more than three percent. Lay the slope so that it runs away from buildings and drains into a plant or lawn area. This not only saves you time-consuming drainage systems, but also ensures the necessary irrigation of the vegetable garden.
Create a suitable substructure for garden plates
The larger the individual panels, the safer they must rest and the more important is the construction of the surface a substructure that is frost-resistant and absolutely solid and even. For break-sensitive natural stone slabs, even the construction of a concrete foundation is recommended. This guarantees that the (always frost-resistant!) Plates will not break even in the course of many years. There are two different ways to create a substructure: permeable to water and impermeable to water. The latter is a concrete foundation that rests on compacted gravel or frost protection gravel.
Build a water-permeable foundation:
For the waterproof substructure, fill a layer of concrete instead of sand or grit. The panels are glued on the still wet concrete, so you should apply the layer not in one go, but in several operations. Otherwise you would have to hurry with the application, alignment and gluing the plates too much.
Laying concrete slabs - That's how it works
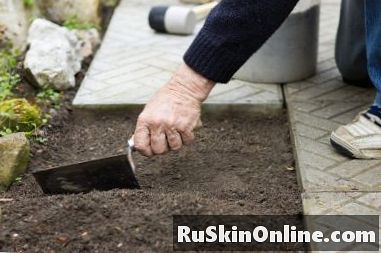
As a rule, a permeable substructure is sufficient for concrete slabs so that the slabs are laid on sand or chippings. Always measure the plates with a leveling bar and align with a trowel or small shovel if necessary. Finally, tap it with a rubber mallet. If you are laying on sand, you should moisten it slightly before laying: this way, you will not be able to sit down after you have laid it. Depending on the type of plate, leave gaps of four to seven millimeters and only then join the next plate.
Grouting concrete slabs
Now you put fine quartz sand into the joints, where it wedges and provides strength. Leave excess sand on the surface for a few days and then sweep it with the broom into the joints where the sand has settled in the meantime.
Laying natural stone slabs - you should pay particular attention to this
Lay natural stone slabs (such as granite, sandstone or basalt) basically as described in the concrete slabs, but do not grout here with quartz sand, but with a special adhesive for natural stone slabs. Final corrections can be made using a rubber hammer. After laying, clean the plates with a wet sponge. Never place panels close to each other without joints, so that they have room to avoid when there are large fluctuations in temperature. Always work from the inside out and try not to leave too much gaps. However, larger gaps can also be filled well with pebbles, small stones or with soil in which you can settle moss or other small ground cover.
Tips
To prevent the panels from tipping off at the edges, the substructure should be placed a little over the surface of the panel. Then you can then fill soil for lawn or a planting area.