
Content
- Laying pond liner - this is how it is done properly and professionally
- Plan pond liner
- Observe outside temperature
- Important when laying
- Laying pond liner - step-by-step instructions
- 1. Prepare pond liner
- 2. Prepare sublayers
- 3. Lay the foil
- 4. Finish the pond
- Tips
Pond foil must be weighted already when laying
Laying pond liner - this is how it is done properly and professionally
A garden pond is quite often a self-construction project - and can easily accomplish itself. However, you should always pay attention to a few things. The professional installation of the film is important, as this depends on the subsequent tightness and life of the film. How to do it right, read here.
Plan pond liner
First of all, you have to commit yourself to a certain kind of slide - a little help we give in this post.
If you have selected the film material for you, you will need to determine and order the required size (length and width) of the film. Calculating the size of the film can be challenging, depending on how complicated the pond shape is. How it goes fundamentally, and how to calculate correctly, we explain in detail in this special contribution.
Then you can order the film from the manufacturer. When it is delivered, it may start laying.
Observe outside temperature
It is best to always lay the slides in summer. At low temperatures, most films are less pliable and stretchy, making them much harder to lay.
In addition, the brittleness, even PVC films have in the cold, cause the film already breaks when laying. Such damage is more than annoying when the just completed pond then later has to be repaired immediately.
Important when laying
You should pay attention to a few things when laying:
Laying pond liner - step-by-step instructions
1. Prepare pond liner
Bring the pond liner made by the manufacturer to the shore of the proposed pond at a pond corner. See if there are any special installation instructions from the manufacturer. Such instructions are common in many cases - you should definitely stick to them.
2. Prepare sublayers
First of all, always place any necessary cable ducts on the bottom of the pond. Then apply a 5 cm thick layer of sand. This layer effectively protects the film later from damage and should have been included in the planning.
On the smooth, fair sand layer, lay out the pond fleece. It must be wrinkle free, pay attention. Then attach the pond fleece at the edges, so that it can not slip when laying over the film.
3. Lay the foil
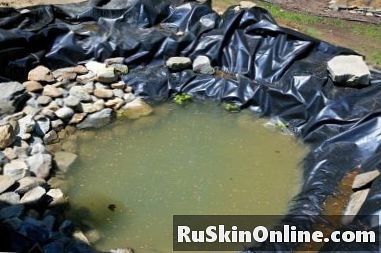
Together with the helpers unfold the foil into the pit from the edge. Always fold wrinkles into a larger fold and flip them over. Fill the pond about one-third with water to weigh down the film and place pebbles on any terraces. This pushes the film deeper into the pond. Let stand for at least one day. The film edges must be weighted.
4. Finish the pond
Fill the pond completely. When the water is filled, you can start building the capillary barrier. Build around the edge of the pond a 10 cm high hill, behind it an equally deep ditch. Pull the foil edges over the hill into the trench and fasten them there (for example between two stones). Fill the ditch with gravel. You may also be able to attach a bank or embankment mat over the foil.
Tips
Terraces, peninsulas and especially terrace corners often cause real difficulties when laying the pond liner. If you build a pond yourself, you should better avoid such complicated structures, unless it is not otherwise.